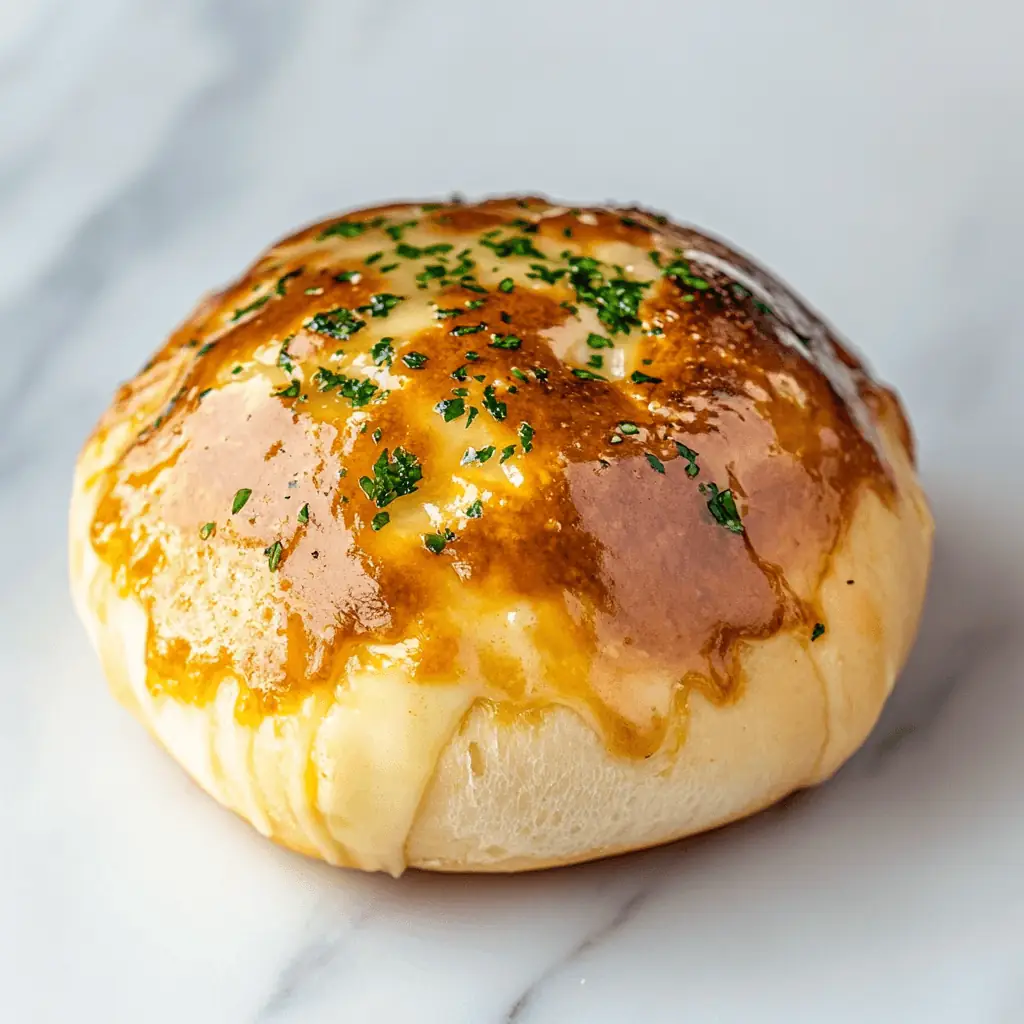
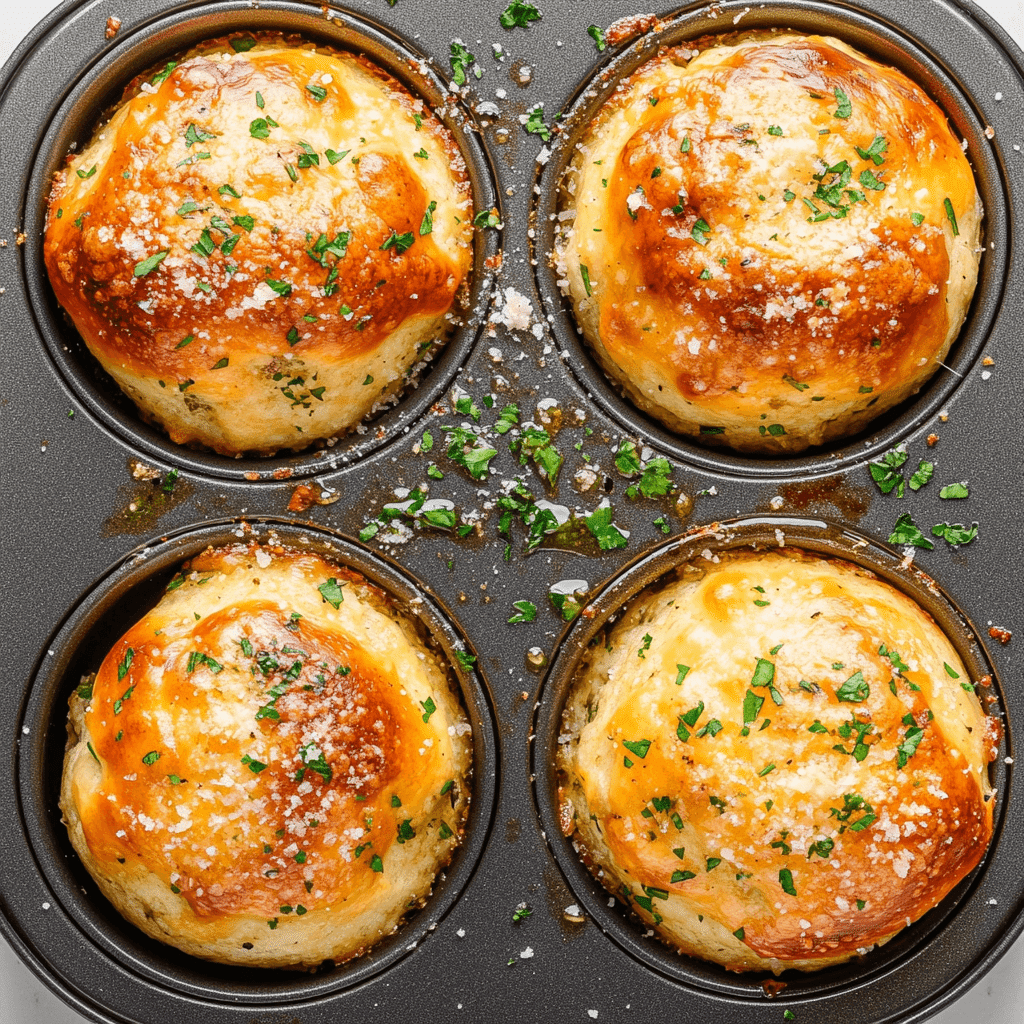
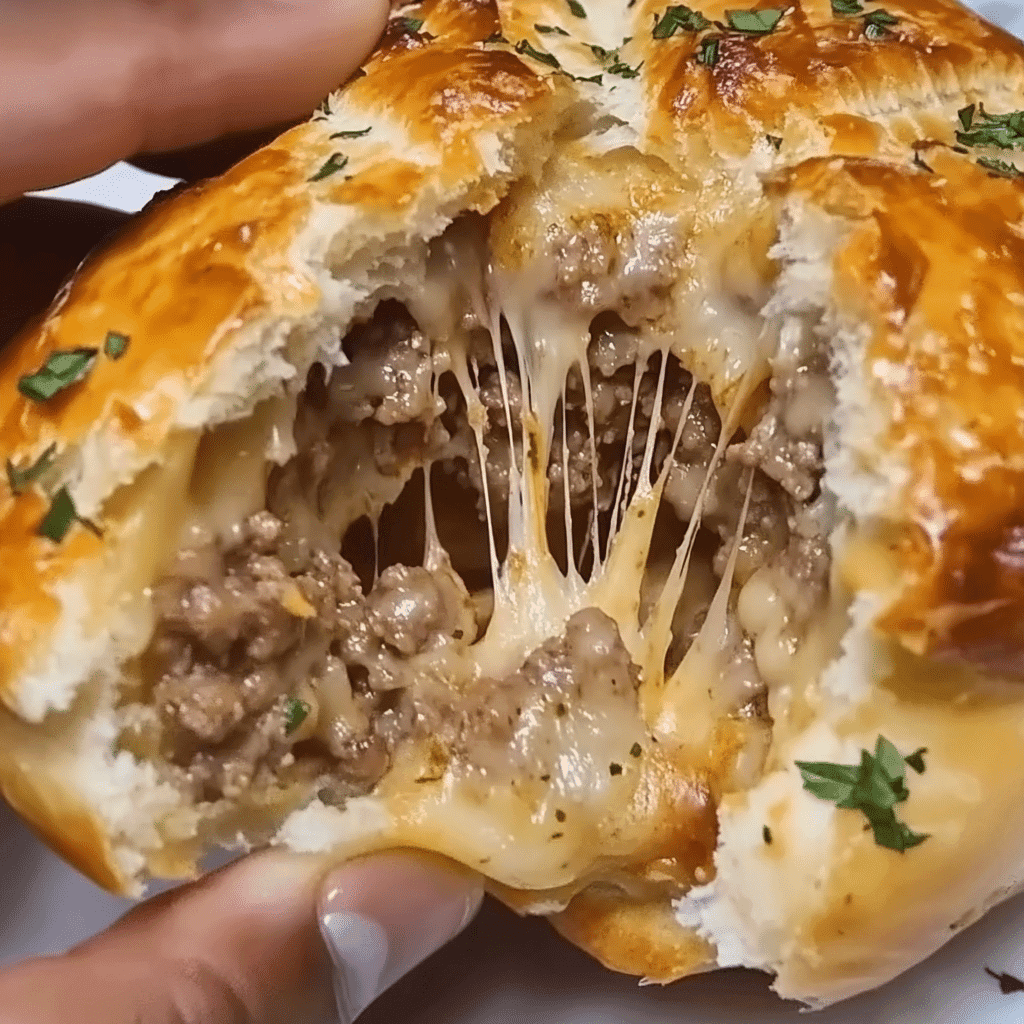
Garlic parmesan cheeseburger bombs are one of those magical creations that take all the best parts of a cheeseburger savory beef, gooey cheese, and a buttery bun and turn them into an irresistible, handheld snack. They’re stuffed, sealed, and baked into golden biscuit dough, brushed with garlic butter, and topped with parmesan. The result is a soft, crispy, cheesy bite of comfort food that’s perfect for weeknight dinners, parties, lunchboxes, or game day.

Whether you’re making garlic parmesan cheeseburger bombs as a fun twist on dinner or prepping ahead for a freezer-friendly snack, these burger bombs are flavorful, family-friendly, and endlessly customizable without the mess or heaviness of a full burger. Let’s kick things off by understanding what makes them so loved.
Table of Contents
What Are Garlic Parmesan Cheeseburger Bombs?
The Rise of Stuffed Comfort Food in American Kitchens
Stuffed comfort foods have taken over modern home kitchens. People want fast, flavorful meals that feel indulgent but don’t require hours of prep. Garlic parmesan cheeseburger bombs hit that sweet spot they combine the classic American cheeseburger with a biscuit-wrapped delivery that’s easy to hold, serve, and enjoy.
This dish appeals to everyone from kids to adults because it’s flexible, warm, and packed with flavor. Unlike sliders or messy burgers, cheeseburger bombs are compact, oven-baked, and come with built-in portion control.
How Cheeseburger Bombs Differ from Traditional Burgers
Traditional burgers are grilled or pan-fried patties served between buns with layers of toppings. While delicious, they’re often messy and time-sensitive especially if you’re serving a crowd. Cheeseburger bombs take a totally different approach:
| Feature | Traditional Burger | Cheeseburger Bomb |
|---|---|---|
| Cooking Method | Grilled or pan-fried | Oven-baked |
| Ingredients | Patty, bun, toppings | Seasoned beef, cheese, biscuit dough |
| Serving Style | Assembled and stacked | Fully enclosed in dough |
| Portability | Needs wrapping/plate | Handheld, no utensils required |
| Mess Factor | Medium to high | Low |
| Freezer Friendly | Not ideal | Perfect for freezing and reheating |
These bombs are not only easier to store and reheat, but they’re also less likely to fall apart in your hands or drip all over your plate. Plus, the garlic butter and parmesan topping add an extra hit of flavor that elevates them beyond basic burgers.
Garlic Parmesan Cheeseburger Bombs

These garlic parmesan cheeseburger bombs combine seasoned beef, melty cheese, and biscuit dough baked until golden, then brushed with garlic butter and topped with parmesan for a crave-worthy, handheld treat.
- Skillet
- Mixing bowl
- Rolling Pin
- Baking sheet or muffin tray
- Pastry brush
- Parchment paper
Filling
- 1 lb ground beef (80/20 preferred)
- 1 tsp garlic powder
- 1 tsp onion powder
- salt & black pepper (to taste)
- 1/2 cup shredded cheddar cheese (freshly shredded preferred)
- 1/2 cup shredded mozzarella cheese (freshly shredded preferred)
Dough and Topping
- 1 tube biscuit dough (8-count, refrigerated)
- 2 tbsp butter (melted)
- 2 garlic cloves (minced)
- 1/4 cup grated parmesan cheese
- chopped parsley (optional, for garnish)
Preheat oven to 375°F (190°C). Line a baking sheet or grease a muffin tin.
In a skillet over medium heat, cook ground beef until browned. Season with garlic powder, onion powder, salt, and pepper. Drain fat.
While hot, stir in cheddar and mozzarella cheeses until melted and combined.
Separate biscuit dough into 8 pieces. Flatten each into a 4–5 inch circle.
Place about 2 tablespoons of the meat mixture in the center of each dough round. Fold and pinch edges to seal. Place seam-side down.
Mix melted butter with minced garlic. Brush over each bomb, then top with grated parmesan and parsley if using.
Bake for 15–18 minutes until golden brown. Let cool 2–3 minutes before serving.
Garlic parmesan cheeseburger bombs are one of those magical creations that take all the best parts of a cheeseburger—savory beef, gooey cheese, and a buttery bun—and turn them into an irresistible, handheld snack. Perfect for dinners, parties, lunchboxes, or game day.
The preparation, cooking, and resting times are approximate and may vary depending on your kitchen equipment and experience. Nutrition information is an estimate based on ingredient data and may differ based on exact brands and portion sizes.
Ingredients & Tools You’ll Need
Essential Ingredients for Garlic Parmesan Cheeseburger Bombs
Making garlic parmesan cheeseburger bombs doesn’t require anything fancy, but the quality and combination of a few key ingredients make all the difference. Stick with simple, fresh components and you’ll get flavor-packed results every time.
Here’s what you’ll need:
| Ingredient | Purpose |
|---|---|
| 1 lb ground beef | The savory heart of each bomb. Use lean but not too dry (80/20 preferred). |
| 1 tsp garlic powder | Infuses flavor in both the beef and the garlic butter. |
| 1 tsp onion powder | Rounds out the seasoning without adding moisture. |
| Salt & black pepper | Simple seasoning that enhances all other flavors. |
| ½ cup shredded cheddar | Offers sharpness and color to the filling. |
| ½ cup shredded mozzarella | Adds that gooey, stretchy melt inside. |
| 1 tube biscuit dough | Buttery outer layer that turns golden and crisp when baked. |
| 2 tbsp butter (melted) | Used for brushing before baking. |
| 2 garlic cloves (minced) | For garlic butter topping fresh garlic is best. |
| ¼ cup grated parmesan | Adds nutty, salty crust on top. |
| Chopped parsley (optional) | Adds freshness and color after baking. |
Note: You can also use pre-shredded cheese, but freshly shredded cheese melts better and gives a creamier interior.
Why We Use Biscuit Dough Instead of Bread or Buns
Biscuit dough is soft, fluffy, and bakes up fast with minimal effort. It gives these garlic parmesan cheeseburger bombs a satisfying bite crispy on the outside, buttery and tender inside. Unlike traditional buns, which require extra steps to toast or shape, biscuit dough is ready to roll, stuff, and bake straight from the tube.
You can also swap in:
- Pizza dough for a stretchier bite
- Homemade biscuit dough if you prefer full control over ingredients
Avoid puff pastry or croissant dough for this recipe they bake too flaky and may leak under the weight of the filling.
Kitchen Tools That Make It Easy
Having the right tools on hand can streamline the process and help your garlic parmesan cheeseburger bombs come out picture-perfect every time. While the recipe itself is simple, a few basic kitchen items make shaping, sealing, and baking much easier.
| Tool | Why It Helps |
|---|---|
| Skillet | For browning the beef evenly |
| Mixing bowl | To combine the filling ingredients |
| Rolling pin or hands | To flatten the biscuit dough circles |
| Baking sheet or muffin tray | Keeps bombs upright while baking |
| Pastry brush | For applying garlic butter before baking |
| Parchment paper | Helps prevent sticking without needing extra oil |
Using a muffin tin is a great trick if you want your cheeseburger bombs to hold a perfect dome shape. Otherwise, a baking sheet works just fine just be sure to space them a few inches apart.
Step-by-Step Recipe Instructions

Cook the Beef
- Heat a skillet over medium heat and add 1 lb ground beef.
- Break it apart as it cooks to ensure even browning.
- Season with 1 tsp garlic powder, 1 tsp onion powder, salt, and black pepper.
- Once fully browned, drain off any excess fat.
Add Cheese
- While the beef is still hot, add:
- ½ cup shredded cheddar
- ½ cup shredded mozzarella
- Stir until the cheese is melted and evenly distributed throughout the meat. This forms the flavorful filling that gives garlic parmesan cheeseburger bombs their signature richness.
Flatten the Dough
- Open 1 tube of refrigerated biscuit dough.
- Separate into 8 pieces and flatten each into a 4 to 5-inch circle using your hands or a rolling pin.
Fill and Seal the Bombs
- Spoon about 2 tablespoons of the beef and cheese mixture into the center of each dough round.
- Add extra shredded cheese on top, if desired.
- Fold the dough over the filling and pinch all edges to seal tightly.
- Place each one seam-side down on a lined baking sheet or greased muffin pan.
Garlic Butter and Parmesan Topping
- In a small bowl, mix:
- 2 tbsp melted butter
- 2 minced garlic cloves
- Brush the tops of each sealed bomb generously.
- Sprinkle with ¼ cup grated parmesan. Add parsley if preferred.
Bake Until Golden
- Set your oven to 375°F (190°C).
- Bake garlic parmesan cheeseburger bombs for 15 to 18 minutes, or until the tops are lightly browned and the dough is baked through.
Serve While Warm
- Let cool for 2–3 minutes before serving.
- Garlic parmesan cheeseburger bombs are best enjoyed warm, with sauces like ranch, ketchup, or garlic dip.
Tips for Perfect Garlic Parmesan Cheeseburger Bombs
Getting garlic parmesan cheeseburger bombs just right is easy with a few small adjustments. These tips ensure you’ll get consistent texture, flavor, and structure every time you make them.
Seal the Dough Properly
If the dough separates in the oven, the cheese mixture may escape. Be sure to:
- Pinch the dough edges firmly after folding.
- Press gently around the seams to reinforce closure.
- Place seam-side down on the pan to help seal naturally.
Avoid Overstuffing
Adding too much filling can cause the dough to tear or burst. Stick to around 2 tablespoons of filling per bomb. That gives you the right amount of filling without risking breaks or leaks.
Use Fresh Cheese for Better Melt
Pre-shredded cheese often contains anti-caking agents that prevent smooth melting. For creamier texture inside your garlic parmesan cheeseburger bombs:
- Shred your own cheddar and mozzarella.
- Use room-temperature cheese to melt faster.
Flatten Evenly for Consistent Baking
Make sure all dough circles are close to the same thickness. If some are too thin or thick:
- Thinner ones may leak or burn.
- Thicker ones may stay doughy inside.
Use a rolling pin or your palm to press evenly to about ¼ inch thick.
Don’t Skip the Garlic Butter Topping
The garlic-parmesan crust gives these bombs their signature flavor and texture. Be generous when brushing the garlic butter and sprinkling parmesan before baking.
Check for Doneness by Color and Feel
Bake time can vary by oven. To test if they’re ready:
- Look for a deep golden top.
- Lightly press one fully cooked bombs should feel firm, not soft or underdone.
Let them cool slightly before serving to help the cheese inside set.
Flavor Variations

Garlic parmesan cheeseburger bombs can be customized in many ways to suit different tastes. These simple, flavorful adjustments let you add variety while keeping the process quick and family-friendly.
Add a Little Heat
For a spicier version:
- Mix in chopped jalapeños or green chilies with the beef.
- Use a dash of crushed red pepper flakes or smoked paprika.
- Replace some of the cheddar with pepper jack cheese for extra flavor.
Pair with cooling dips like ranch or garlic yogurt sauce to balance the heat.
Go Meatless
For a vegetarian version, replace the beef with:
- Sautéed mushrooms and onions
- Seasoned mashed lentils
- Plant-based ground alternatives
Keep the same cheese blend or opt for dairy-free if preferred. These meatless garlic parmesan cheeseburger bombs are still packed with flavor and texture.
Switch Up the Cheese
Different cheeses create new flavor profiles:
- Colby Jack for a creamy, mellow bite
- Provolone or Swiss for a sharper edge
- Low-moisture mozzarella for a smoother melt
Avoid watery cheeses that can affect the texture of the dough.
Kid-Friendly Adjustments
Make it mild and simple for younger eaters:
- Stick with cheddar or mozzarella only
- Use smaller portions for bite-sized bombs
- Serve with ketchup or mild dipping sauce on the side
These changes make the bombs easier to handle and enjoy.
Add Fresh Herbs or Citrus
Chopped fresh herbs like parsley, chives, or a bit of lemon zest can be added to the garlic butter or beef mixture. These brighten up the overall flavor and complement the richness of the filling.
Mini Cheeseburger Bombs
Use smaller dough portions and less filling to make mini versions. These bite-sized garlic parmesan cheeseburger bombs are great for platters, lunchboxes, or meal prep. Bake for 8–10 minutes at 375°F until golden and fully cooked through
Serving Ideas & Pairings
Recommended Side Dishes
- Oven fries or sweet potato wedges
- Simple green salad
- Coleslaw
- Roasted vegetables (e.g., broccoli, carrots)
- For a lighter, high-protein side that’s still satisfying, try pairing these cheeseburger bombs with cottage cheese bagels they’re easy to make and balance out the richness of the filling.
Want something buttery and fresh on the side? Serve your cheeseburger bombs with cheesy garlic butter corn for a classic comfort food combo.
These sides balance the richness of garlic parmesan cheeseburger bombs.
Dipping Sauces
- Ketchup
- Ranch dressing
- Garlic yogurt dip
- Mild mustard or spicy mayo
Use 1–2 dips per serving for variety.
Drink Pairings
- Iced tea
- Sparkling water with lemon
- Fruit juice (apple, orange, or pomegranate)
- Light soda or mocktails
Stick to drinks that won’t overpower the flavor.
Occasions to Serve
- Dinner or lunch
- Snack trays or meal prep
- Party appetizers
- Kids’ lunchboxes
Their size and structure make them easy to serve, store, and reheat.
Storage, Freezing, and Reheating
Refrigeration
- Store leftover garlic parmesan cheeseburger bombs in an airtight container.
- Refrigerate for up to 3 days.
- Let them cool fully before storing to prevent condensation and soggy dough.
Freezing
- Let bombs cool completely after baking.
- Wrap each one in foil or plastic wrap, then place in a freezer bag or container.
- Freeze for up to 2 months.
- For best results, label with the date.
Reheating Options
| Method | Instructions |
|---|---|
| Oven | Preheat to 350°F, bake for 10–12 minutes |
| Air Fryer | Set to 350°F, heat for 6–8 minutes |
| Microwave | Heat on high for 30–45 seconds (texture may soften) |
Avoid microwaving directly from frozen. Thaw in the fridge overnight or reheat from frozen in the oven for best texture.
Common Mistakes to Avoid
Avoiding these simple errors will improve consistency and results when making garlic parmesan cheeseburger bombs.
Overfilling the Dough
Adding too much filling can cause the dough to tear or leak during baking. Stick to 2 tablespoons of beef-cheese mixture per bomb.
Not Sealing Properly
Loose seams lead to cheese escaping in the oven. Always:
- Pinch all edges tightly
- Place bombs seam-side down on the tray
Proper sealing ensures your garlic parmesan cheeseburger bombs hold their shape and stay intact while baking.
Using Cold Dough
Chilled dough cracks and resists sealing. Let refrigerated biscuit dough sit at room temperature for 5–10 minutes before working with it.
Skipping Garlic Butter Topping
This step adds flavor and improves the crust. Don’t skip the butter, garlic, and parmesan topping.
Baking Too Long or Too Short
Overbaking dries the dough; underbaking leaves it raw inside. Check for even golden brown tops and bake for 15–18 minutes at 375°F.
Microwaving Without Care
Microwaving for too long can make bombs soggy. If using a microwave, limit to short bursts (30–45 seconds) and use a paper towel to absorb moisture.
FAQs: Garlic Parmesan Cheeseburger Bombs
What makes a cheeseburger bomb unique?
How long do you cook a burger bomb for?
What are some creative ways to serve cheeseburger bombs?
Why did Margot order a cheeseburger?
Garlic parmesan cheeseburger bombs are easy to make, full of flavor, and perfect for any meal or occasion. With simple ingredients and quick prep, they deliver cheesy, buttery goodness in every bite. Make them once, and they’ll become a go-to favorite.
Craving more crowd-pleasing recipes? Explore all our appetizers & snacks for your next party or easy weeknight treat.
